2021년은 fullstack next.js 원년이므로, 유망한 next.js 계열 프레임워크를 전부 체험했다.
이글은 Next.js Advent Calendar 2020 6일째를 위한 글입니다.
갑작스럽지만 2021년은 Fullstack Next.js의 원년이 됩니다.
저는 이하의 이유로 그렇게 생각합니다.
- 모범방안으로 TypeScript의 De facto화
- Next.js 의 Dynamic Routes에 의한 동적 패스, getStaticProps/getServerSideProps에 의한 사용 유연성 상승
- Vercel에 의한 ISR 발명
- prisma 성숙
- Vercel / Serverless / Cloudflare Workers / Cloudrun 등에 의한 Node.js 서버운용 비용 감소
참조:
- Frontend Study #1: 기조연설 - Frontend 영역을 재정의하다
- Blog - Next.js 9.3 | Next.js
- Routing: Dynamic Routes | Next.js
- API Routes: Introduction | Next.js
- Prisma - Next-generation ORM for Node.js and TypeScript
vue의 nuxt 뿐이 아니라, rollup의 sapper, deno의 aleph 등 next.js follwer, 그리고 blitz나 frourio 같이 next 랩퍼 라이브러리도 출현했습니다.
2020년은 이들에게 시행착오의 해였다 생각하며, 내년 이후로는 이들이 실제 제품화 된다 생각합니다.
그렇지만 Node, webpack의 모범사례에 구속되어있지만, 풀스택 프레임워크로 모범사례가 정해진 것은 아닙니다. 이번 글에는 현시점에서 유망한 프레임워크를 닥치는대로 수동으로 다루며, 코드를 비교하려 합니다.
- next: 본가
- nuxt: vue 판 next
- blitz: next + prisma 으로 rails like fullstack
- frourio: aspida + fastify + 임의의 UI 프레임워크
- bison: 라이브러리를 드러내는 blitz
- redwood: 독립된 router 프레임워크
- aleph: deno 판 next
- sapper: svelte 판 next
- sveltekit: 차기 버전 svelte 본체에 포함될 sapper의 후계
- flareact: Cloudflare Workers에 특화된 Edge Side next
- layr: RPC구현
Next.js 발명이란
- File Based (Dynamic) Routing: 파일을 둔 곳이 자동적으로 루팅이 결정된다. 또 파일명이 동적 파라메터된다.
- Component Based SSR / Hydration: 루팅에 대응해서 Component가 자동적으로 SSR되고, Hydration 된다. 또 화면 trainsistion 할 때 차이 부분만 갱신하므로 CSR 최적화
- Server / SSG Hybrid: 정적 사이트, 동적사이트를 필요에 의해 쓸 수 있다.
규약이 있어서 생산성, 퍼포먼스를 최적화한다는 방향성이 Next 계의 본질이라 개인적으로 생각합니다.
프레임워크 체험 방향성
- index 페이지 만든다
- API Routes 기능이 있으면 사용한다
- 프레임워크 특유의 기능을 체험
- typescript화 한다
자, 시작합시다.
next.js
우선 next.js 기본적 기능을 소개합니다.
- src/pages/**.tsx에 export default 한 컴포넌트를 SSR한다.
- src/pages/api/**.ts에 export default 한 함수를 Lambda Function 으로 호출
$ mkdir next-app
$ cd next-app
$ yarn add react react-dom next
$ yarn add @types/react-dom @types/node typescript -D

# / 에 대응하는 컴포넌트 작성
$ code src/pages/index.tsx
export default function Index() {
  return <h1>Hello Next</h1>;
}
# /api/hello 에 대응하는 API Endpoint
$ code src/pages/api/hello.ts
export default function handler(_req, res) {
  res.send('ok');
}
개발용 서버 기동
$ yarn next # 기동

# 브라우저 열기
$ open http://localhost:3000

# API
$ curl http://localhost:3000/api/hello
ok
제품 빌드
$ yarn next build
이게 Next계 애플리케이션의 기본구성
Nuxt
vue 판 next.js
$ mkdir nuxt-app
$ cd nuxt-app
$ yarn init -y
$ yarn add nuxt @nuxt/typescript-runtime
$ yarn add @nuxt/types @nuxt/typescript-build -D
$ code tsconfig.json
tsconfig 추가
{
  "compilerOptions": {
    "target": "ES2019",
    "module": "ESNext",
    "moduleResolution": "Node",
    "lib": ["ESNext", "ESNext.AsyncIterable", "DOM"],
    "esModuleInterop": true,
    "allowJs": true,
    "sourceMap": true,
    "strict": true,
    "noEmit": true,
    "baseUrl": ".",
    "paths": {
      "~/*": ["./*"],
      "@/*": ["./*"]
    },
    "types": ["@types/node", "@nuxt/types"]
  },
  "exclude": ["node_modules"]
}
엔트리 포인트를 추가
$ code pages/index.vue
<template>
  <h1>Hello Nuxt</h1>
</template>
<script lang="ts">
export default {};
</script>
서버 API 추가
$ code nuxt.config.js
export default {
  buildModules: ['@nuxt/typescript-build'],
  serverMiddleware: [{ path: '/api', handler: '~/api/index.ts' }],
};
$ code api/index.ts
import express from 'express';
module.exports = express().get(
  '/hello',
  (_req: express.Request, res: express.Response) => res.send('ok')
);
지금 상황
$ tree . -I node_modules
.
├── api
│   └── index.ts
├── nuxt.config.js
├── package.json
├── pages
│   └── index.vue
├── tsconfig.json
├── types
│   └── nuxt.d.ts
└── yarn.lock
서버 기동
$ yarn nuxt-ts
next와 같이 http://localhost:3000/에 페이지 게시, http://localhost:3000/api/hello로 ok 반환 받음
빌드
$ yarn nuxt-ts build
.nuxt 이하로 출력된다.
Blitz
next + prisma 으로 rails like한 규약 기반 개발 흐름을 지향하는 프레임워크
상세는 여길 참조.
$ npx blitz new blitz-app
$ cd blitz-app
$ blitz db migrate
$ blitz generate all project name:string
$ yarn blitz db migrate --init
$ blitz db migrate
# browser
$ open http://localhost:3000/projects
next.js 애플리케이션과는 다르게 user, projects 밑에 하나의 애플리케이션으로 되어있지만, 빌드할 때 하나의 next.js 애플리케이션으로 머시된다. 상세는 .blitz 밑을 보면 알 수 있다.
- colinhacks/zod: TypeScript-first schema validation with static type inference
- React Final Form
- Prisma - Next-generation ORM for Node.js and TypeScript
- tannerlinsley/react-query: ⚛️ Hooks for fetching, caching and updating asynchronous data in React: blitz-query 의 실체
- Jest
- TypeScript
또 blitz에는 */{queries,mutations}/* 밑의 파일은 어느정도 규약을 따르면 클라이언트에서 호출할 수 있도록 컴파일 된다. 상세는 여기
빌드
$ blitz build
.blitz 밑에는 next 폴더 구성에 따라 폴더가 만들어져있음.
즉 다단 빌드되어있음
Frourio
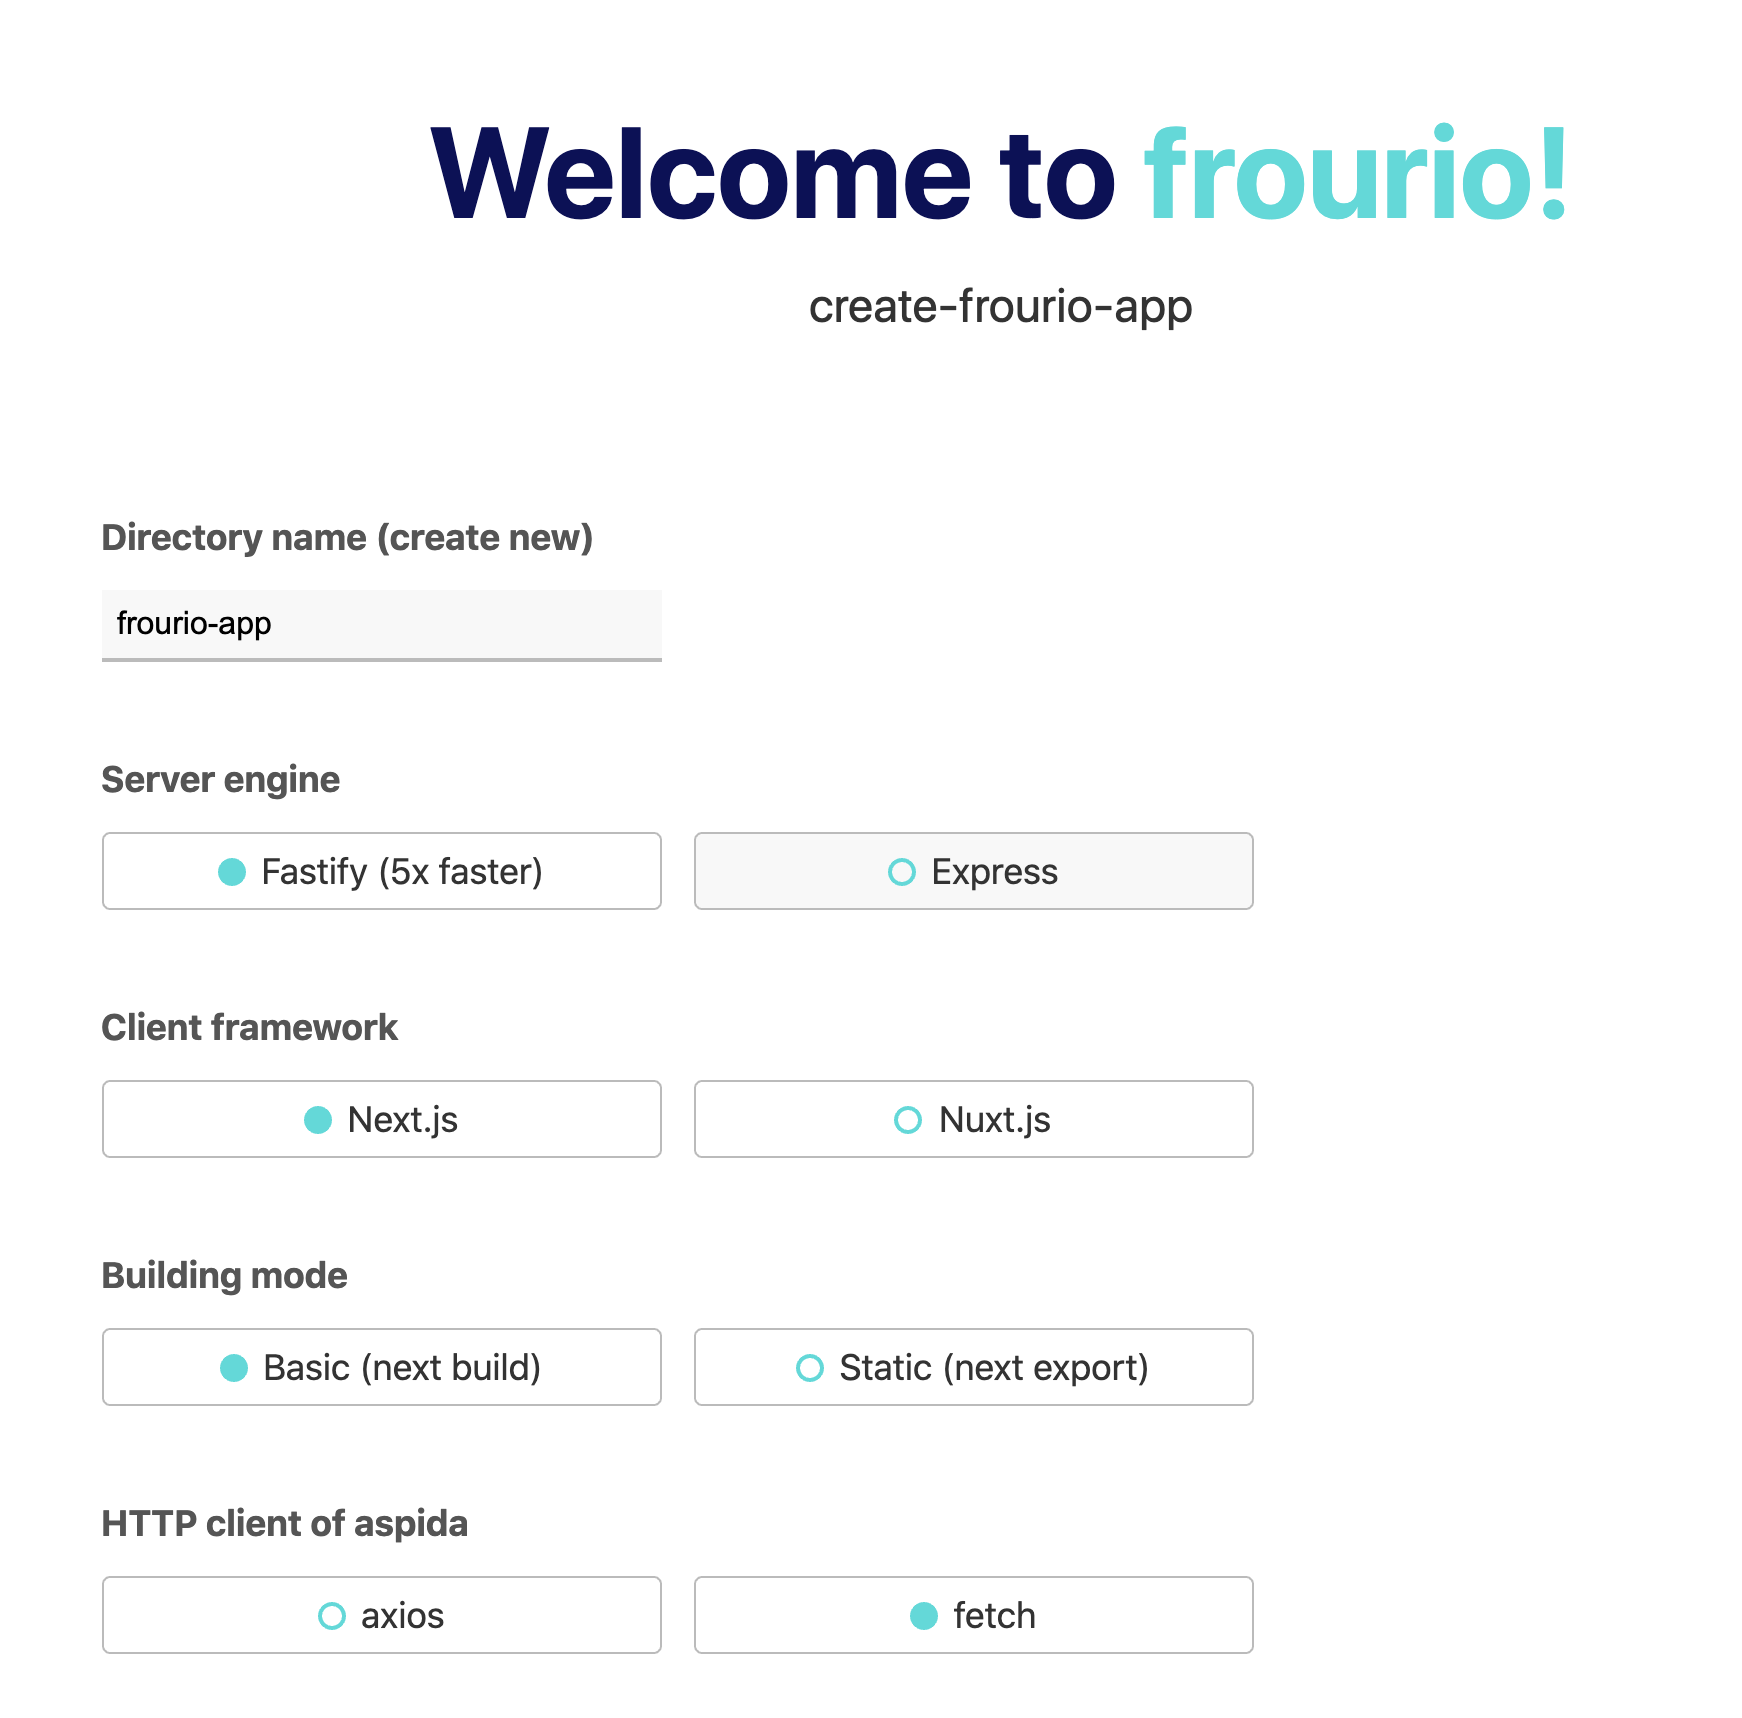
풀스택프레임워크, 혹은 풀스택에 대응하기 위한 서버사이드 생성 도구 TypeScript + Aspida를 축으로 여러 라이브러리를 골라 프로젝트를 생성한다.
선택 가능 라이브러리
- next/nuxt
- prisma/typeorm
- fetch/axios
이번에는 next/prisma(sqlite)/fetch
.
├── README.md
├── aspida.config.js
├── components
│   └── UserBanner.tsx
├── next-env.d.ts
├── package.json
├── pages
│   ├── _app.tsx
│   └── index.tsx
├── public
│   ├── favicon.png
│   └── vercel.svg
├── server
│   ├── $server.ts
│   ├── api
│   │   ├── $api.ts
│   │   ├── $relay.ts
│   │   ├── controller.ts
│   │   ├── index.ts
│   │   ├── tasks
│   │   │   ├── $relay.ts
│   │   │   ├── _taskId@number
│   │   │   │   ├── $relay.ts
│   │   │   │   ├── controller.ts
│   │   │   │   └── index.ts
│   │   │   ├── controller.ts
│   │   │   └── index.ts
│   │   ├── token
│   │   │   ├── $relay.ts
│   │   │   ├── controller.ts
│   │   │   └── index.ts
│   │   └── user
│   │       ├── $relay.ts
│   │       ├── controller.ts
│   │       ├── hooks.ts
│   │       └── index.ts
│   ├── index.js
│   ├── index.ts
│   ├── package.json
│   ├── prisma
│   │   ├── dev.db
│   │   ├── migrations
│   │   │   ├── 20201001130532
│   │   │   │   ├── README.md
│   │   │   │   ├── schema.prisma
│   │   │   │   └── steps.json
│   │   │   └── migrate.lock
│   │   └── schema.prisma
│   ├── public
│   │   └── icons
│   │       └── dammy.svg
│   ├── service
│   │   ├── envValues.ts
│   │   ├── tasks.ts
│   │   └── user.ts
│   ├── tsconfig.json
│   ├── types
│   │   └── index.ts
│   ├── validators
│   │   └── index.ts
│   ├── webpack.config.js
│   └── yarn.lock
├── styles
│   ├── Home.module.css
│   ├── UserBanner.module.css
│   └── globals.css
├── tsconfig.json
├── utils
│   └── apiClient.ts
└── yarn.lock

19 directories, 51 files
클라이언트 측을 보자.
pages/index.tsx
import Head from 'next/head';
import { useCallback, useState, FormEvent, ChangeEvent } from 'react';
import useAspidaSWR from '@aspida/swr';
import styles from '~/styles/Home.module.css';
import { apiClient } from '~/utils/apiClient';
import { Task } from '$prisma/client';
import UserBanner from '~/components/UserBanner';

const Home = () => {
  const {
    data: tasks,
    error,
    mutate: setTasks,
  } = useAspidaSWR(apiClient.tasks);
  const [label, setLabel] = useState('');
  const inputLavel = useCallback(
    (e: ChangeEvent<HTMLInputElement>) => setLabel(e.target.value),
    []
  );

  const createTask = useCallback(
    async (e: FormEvent) => {
      e.preventDefault();
      if (!label) return;

      await apiClient.tasks.post({ body: { label } });
      setLabel('');
      setTasks(await apiClient.tasks.$get());
    },
    [label]
  );

  const toggleDone = useCallback(async (task: Task) => {
    await apiClient.tasks
      ._taskId(task.id)
      .patch({ body: { done: !task.done } });
    setTasks(await apiClient.tasks.$get());
  }, []);

  const deleteTask = useCallback(async (task: Task) => {
    await apiClient.tasks._taskId(task.id).delete();
    setTasks(await apiClient.tasks.$get());
  }, []);

  if (error) return <div>failed to load</div>;
  if (!tasks) return <div>loading...</div>;

  return (
    <div className={styles.container}>
      <Head>
        <title>frourio-todo-app</title>
        <link rel="icon" href="/favicon.png" />
      </Head>

      <main className={styles.main}>
        <UserBanner />

        <h1 className={styles.title}>
          Welcome to <a href="https://nextjs.org">Next.js!</a>
        </h1>

        <p className={styles.description}>frourio-todo-app</p>

        <div>
          <form style={{ textAlign: 'center' }} onSubmit={createTask}>
            <input value={label} type="text" onChange={inputLavel} />
            <input type="submit" value="ADD" />
          </form>
          <ul className={styles.tasks}>
            {tasks.map((task) => (
              <li key={task.id}>
                <label>
                  <input
                    type="checkbox"
                    checked={task.done}
                    onChange={() => toggleDone(task)}
                  />
                  <span>{task.label}</span>
                </label>
                <input
                  type="button"
                  value="DELETE"
                  style={{ float: 'right' }}
                  onClick={() => deleteTask(task)}
                />
              </li>
            ))}
          </ul>
        </div>
      </main>

      <footer className={styles.footer}>
        <a
          href="https://vercel.com?utm_source=create-next-app&utm_medium=default-template&utm_campaign=create-next-app"
          target="_blank"
          rel="noopener noreferrer"
        >
          Powered by{' '}
          <img src="/vercel.svg" alt="Vercel Logo" className={styles.logo} />
        </a>
      </footer>
    </div>
  );
};

export default Home;
@aspida/swr의 useAspidaSWR를 사용해 데이터를 받고있다.
어떻게 타입을 얻지? 생각해서 알아보니 이런 느낌, aspida가 자동생성 타입 정의를 뽑아낸다
util/apiClient.ts
import aspida from '@aspida/fetch';
import api from '~/server/api/$api';

export const apiClient = api(aspida());
서버사이드를 보면
- fastify
- fastify-jwt
- prisma
- dotenv
이런 구성입니다.
npm scripts
    "dev": "npm run migrate:up && run-p dev:*",
    "dev:server": "webpack --watch --mode=development",
    "dev:frourio": "frourio --watch",
    "dev:prisma": "prisma generate --watch",
    "build": "npm run build:frourio && webpack --mode=production",
    "build:frourio": "npm run migrate:up && prisma generate && frourio",
    "migrate": "npm run migrate:save && npm run migrate:up",
    "migrate:save": "prisma migrate save --create-db --experimental",
    "migrate:up": "prisma migrate up --create-db --experimental",
    "migrate:down": "prisma migrate down --experimental",
    "start": "cross-env NODE_ENV=production node index.js"
frourio-app 보일러 플레이트 생성과 별개로 frourio 커맨드가 aspida 주변 타입 생성을 하는 느낌
클라이언트에서 호출한 tasks 구현을 보자
server/tasks/controller.ts
import { defineController } from './$relay';
import { getTasks, createTask } from '$/service/tasks';

export default defineController(() => ({
  get: async () => ({ status: 200, body: await getTasks() }),
  post: async ({ body }) => ({
    status: 201,
    body: await createTask(body.label),
  }),
}));
server/api/tasks/index.ts
import { Task } from '$prisma/client';

export type Methods = {
  get: {
    query?: {
      limit?: number;
    };

    resBody: Task[];
  };
  post: {
    reqBody: Pick<Task, 'label'>;
    resBody: Task;
  };
};
server/service/tasks.ts 의 getTasks
import { PrismaClient } from '@prisma/client';
import { Task, TaskUpdateInput } from '$prisma/client';

const prisma = new PrismaClient();

export const getTasks = async (limit?: number) =>
  (await prisma.task.findMany()).slice(0, limit);

export const createTask = (label: Task['label']) =>
  prisma.task.create({ data: { label } });

export const updateTask = (id: Task['id'], partialTask: TaskUpdateInput) =>
  prisma.task.update({ where: { id }, data: partialTask });

export const deleteTask = (id: Task['id']) =>
  prisma.task.delete({ where: { id } });
내부적으로 fastify 용 JSONSchema도 생성하는 듯
fastify JSONSchema를 적어 고속화하는 특징을 충분히 발휘 등등 똘똘함
api층, service층 나눠지는 것도 합리적
모듈러에 어떤 리포지토리층 구현해도 합당
상세히 다룰려 했지만 주제에 벗어남으로 다른 글에 언급하겠습니다.
파일 시스템 규약으로 움직임이 정해지는 것이 좋음 제약에 의해 퍼포먼스 최적화함으로 next.js API 서버 버전 느낌.
RedWood
prisma, GraphQL 사용.
next.js 영향을 받았지만 router, SSR가 독자적임 (next 사용 안 함)
Typesciprt도 사용안하며, 꽤 사상이 다름
$ yarn create redwood-app redwood-app
폴더구성
├── LICENSE
├── README.md
├── api
│   ├── db
│   │   ├── schema.prisma
│   │   └── seeds.js
│   ├── jest.config.js
│   ├── jsconfig.json
│   ├── package.json
│   └── src
│       ├── functions
│       │   └── graphql.js
│       ├── graphql
│       ├── lib
│       │   └── db.js
│       └── services
├── babel.config.js
├── graphql.config.js
├── package.json
├── prettier.config.js
├── redwood.toml
├── web
│   ├── jest.config.js
│   ├── jsconfig.json
│   ├── package.json
│   ├── public
│   │   ├── README.md
│   │   ├── favicon.png
│   │   └── robots.txt
│   └── src
│       ├── Routes.js
│       ├── components
│       ├── index.css
│       ├── index.html
│       ├── index.js
│       ├── layouts
│       └── pages
│           ├── FatalErrorPage
│           │   └── FatalErrorPage.js
│           └── NotFoundPage
│               └── NotFoundPage.js
└── yarn.lock

15 directories, 27 files
클라/서버는 web, api 2개로 구별
Router 독자적
web/src/routes/Routes.js
// In this file, all Page components from 'src/pages` are auto-imported. Nested
// directories are supported, and should be uppercase. Each subdirectory will be
// prepended onto the component name.
//
// Examples:
//
// 'src/pages/HomePage/HomePage.js'         -> HomePage
// 'src/pages/Admin/BooksPage/BooksPage.js' -> AdminBooksPage

import { Router, Route } from '@redwoodjs/router';

const Routes = () => {
  return (
    <Router>
      <Route notfound page={NotFoundPage} />
    </Router>
  );
};

export default Routes;
react-router 스러움
Bison
blitz같이 next 랩퍼계열, blitz가 next를 숨기는데에 반해 bison은 다 보여주는 것이 특징
$ yarn create bison-app bison-app
$ tree . -I node_modules
.
├── README.md
├── _templates
│   ├── cell
│   │   └── new
│   │       └── new.ejs
│   ├── component
│   │   └── new
│   │       └── new.ejs
│   ├── graphql
│   │   └── new
│   │       ├── graphql.ejs
│   │       └── injectImport.ejs
│   ├── page
│   │   └── new
│   │       └── new.ejs
│   └── test
│       ├── component
│       │   └── component.ejs
│       ├── factory
│       │   └── factory.ejs
│       └── request
│           └── request.ejs
├── api.graphql
├── chakra
│   └── index.ts
├── codegen.yml
├── components
│   ├── AllProviders.tsx
│   ├── CenteredBoxForm.tsx
│   ├── ErrorText.tsx
│   ├── FullPageSpinner.tsx
│   ├── LoginForm.tsx
│   ├── Logo.tsx
│   ├── Nav.tsx
│   └── SignupForm.tsx
├── constants.ts
├── context
│   └── auth.tsx
├── cypress
│   ├── plugins
│   │   └── index.ts
│   ├── support
│   │   ├── commands.ts
│   │   └── index.ts
│   └── tsconfig.json
├── cypress.json
├── graphql
│   ├── context.ts
│   ├── modules
│   │   ├── index.ts
│   │   ├── profile.ts
│   │   ├── scalars.ts
│   │   └── user.ts
│   └── schema.ts
├── jest.config.js
├── layouts
│   ├── LoggedIn.tsx
│   └── LoggedOut.tsx
├── lib
│   ├── apolloClient.ts
│   ├── cookies.ts
│   └── prisma.ts
├── next-env.d.ts
├── package.json
├── pages
│   ├── _app.tsx
│   ├── api
│   │   └── graphql.ts
│   ├── index.tsx
│   ├── login.tsx
│   └── signup.tsx
├── prettier.config.js
├── prisma
│   ├── migrations
│   │   ├── 20200726094736-initial-migration
│   │   │   ├── README.md
│   │   │   ├── schema.prisma
│   │   │   └── steps.json
│   │   ├── 20200726203519-profile-timestamps
│   │   │   ├── README.md
│   │   │   ├── schema.prisma
│   │   │   └── steps.json
│   │   └── migrate.lock
│   ├── schema.prisma
│   └── seeds.js
├── public
│   ├── favicon.ico
│   └── vercel.svg
├── scripts
│   ├── buildProd.ts
│   ├── dropDatabase.ts
│   └── yarnWithEnv.ts
├── services
│   ├── auth.ts
│   └── permissions.ts
├── tests
│   ├── e2e
│   │   ├── login.test.js
│   │   ├── logout.test.js
│   │   └── tsconfig.json
│   ├── factories
│   │   ├── index.ts
│   │   └── user.ts
│   ├── helpers.ts
│   ├── jest.setup.js
│   ├── jest.teardown.js
│   ├── matchMedia.mock.js
│   ├── requests
│   │   └── user
│   │       ├── createUser.test.ts
│   │       ├── login.test.ts
│   │       ├── me.test.ts
│   │       ├── signup.test.ts
│   │       └── users.test.ts
│   ├── unit
│   │   ├── components
│   │   │   ├── CenteredBoxForm.test.tsx
│   │   │   ├── ErrorText.test.tsx
│   │   │   ├── LoginForm.test.tsx
│   │   │   ├── Logo.test.tsx
│   │   │   ├── Nav.test.tsx
│   │   │   └── SignupForm.test.tsx
│   │   └── utils
│   └── utils.tsx
├── tsconfig.cjs.json
├── tsconfig.json
├── types.ts
└── utils
    └── setErrors.ts

41 directories, 88 files
- prisma
- GraphQL Nexus · Declarative, Code-First GraphQL Schemas for JavaScript/TypeScript
- Templates | Hygen
- Chakra UI - A simple, modular and accessible component library that gives you the building blocks you need to build your React applications. - Chakra UI
- Cypress
- Jest
GraphqlNexus는 DSL으로 타입 정의하면서 구현도 정의함
import { objectType } from '@nexus/schema';

// Profile Type
export const Profile = objectType({
  name: 'Profile',
  description: 'A User Profile',
  definition(t) {
    t.model.id();
    t.model.firstName();
    t.model.lastName();
    t.model.createdAt();
    t.model.updatedAt();
    t.model.user();
    t.string('fullName', {
      nullable: true,
      description: 'The first and last name of a user',
      resolve({ firstName, lastName }) {
        return [firstName, lastName].filter((n) => Boolean(n)).join(' ');
      },
    });
  },
});
blitz generate 정도의 커맨드를 갖지 않은 대신, hygen 이라는 scaffolding 도구를 사용하고 있다.
chakra-ui는 최근 자주 사용하는 것으로 tailwinds 계열 컴포넌트 프레임워크
blitz 레시피가 1개 있는데, 마크업 엔지니어 연계하면 편리.
빌드
$ yarn build
next와 똑같이 빌드함
Aleph
deno제 next.js 계열 프레임워크
$ aleph init aleph-app
$ cd aleph-app
$ aleph dev # localhost:8080
pages/index.tsx
import { Import, useDeno } from 'https://deno.land/x/aleph/mod.ts';
import React, { useState } from 'https://esm.sh/react';
import Logo from '../components/logo.tsx';
export default function Home() {
const [count, setCount] = useState(0);
const version = useDeno(() => {
return Deno.version;
});
return (
<div className="page">
<Import from="../style/index.less" />
<p className="logo">
<Logo />
</p>
<h1>
Welcome to use <strong>Aleph.js</strong>!
</h1>
<p className="links">
<a href="https://alephjs.org" target="_blank">
Website
</a>
<span>·</span>
<a href="https://alephjs.org/docs/get-started" target="_blank">
Get Started
</a>
<span>·</span>
<a href="https://alephjs.org/docs" target="_blank">
Docs
</a>
<span>·</span>
<a href="https://github.com/alephjs/aleph.js" target="_blank">
Github
</a>
</p>
<p className="counter">
<span>Counter:</span>
<strong>{count}</strong>
<button onClick={() => setCount((n) => n - 1)}>-</button>
<button onClick={() => setCount((n) => n + 1)}>+</button>
</p>
<p className="copyinfo">Built by Aleph.js in Deno v{version.deno}</p>
</div>
);
}
useDeno는 서버사이드에서만 실행가능
클라이언트에는 hydration 할 때 실행 결과 주입됨
const post = useDeno(async () => {
  return await (await fetch(`https://.../post/${params.id}`)).json();
}, true);
구성
.
├── app.tsx
├── components
│   └── logo.tsx
├── import_map.json
├── pages
│   └── index.tsx
├── public
│   ├── favicon.ico
│   └── logo.svg
└── style
    └── index.less
새 routing 추가
$ code pages/foo.tsx
import React from 'https://esm.sh/react';

export default function Foo() {
  return <div className="page">foo</div>;
}
API Route 추가
$ code api/foo.tsx
import type { APIRequest } from 'https://deno.land/x/aleph/types.ts';

export default function handler(req: APIRequest) {
  req.status(200).send('ok');
}
request 객체에 send하는게 어색함
디플로이 방법 찾다가 재밌는 거 발견
Vercel 외에 Fleek 호스팅 지원중
IPFS 베이스 호스팅임
문서를 보면 임의의 컨테이너를 업로드하는 느낌
- Build Command: deno run -A https://deno.land/x/aleph@v0.2.26/cli.ts build
- Docker Image Name: hayd/deno
- Output Directory: dist (outputDir, you can override it in aleph.config.js)
- Environment Variables: NO_COLOR (recommended)
- APIs(Functions): not supported currently
대신 지금은 어떤 것을 사용해도 aleph api routes는 작동 안 하는 듯
Sapper
svelte 기반 next계 프레임워크
svelte는 rollup 등을 개발한 Rich Harris가 개발한 것
Vue 스럽게 프리컴파일 시 최적화를 한다
런타임 한계까지 옅어진 프레임워크
├── README.md
├── __sapper__
│   └── dev
│       ├── build.json
│       ├── client
│       │   ├── 465898c830bb9d2c.jpg
│       │   ├── [slug]-5bc8f95f.css
│       │   ├── [slug].2922cc3a.js
│       │   ├── about.2cf04b36.js
│       │   ├── client-e118e612.css
│       │   ├── client.0d1fad1f.js
│       │   ├── index-39716d32.css
│       │   ├── index-7ed37c94.css
│       │   ├── index.4ca45b6e.js
│       │   ├── index.cd2c953b.js
│       │   ├── inject_styles.5607aec6.js
│       │   ├── sapper-dev-client.1e7a4a5e.js
│       │   └── shimport@2.0.4.js
│       ├── server
│       │   └── server.js
│       └── service-worker.js
├── package.json
├── rollup.config.js
├── scripts
│   └── setupTypeScript.js
├── src
│   ├── ambient.d.ts
│   ├── client.js
│   ├── components
│   │   └── Nav.svelte
│   ├── routes
│   │   ├── _error.svelte
│   │   ├── _layout.svelte
│   │   ├── about.svelte
│   │   ├── blog
│   │   │   ├── [slug].json.js
│   │   │   ├── [slug].svelte
│   │   │   ├── _posts.js
│   │   │   ├── index.json.js
│   │   │   └── index.svelte
│   │   └── index.svelte
│   ├── server.js
│   ├── service-worker.js
│   └── template.html
├── static
│   ├── favicon.png
│   ├── global.css
│   ├── logo-192.png
│   ├── logo-512.png
│   └── manifest.json
└── yarn.lock

10 directories, 41 files
src/routes/index.svelte
<script>
	import successkid from 'images/successkid.jpg';
</script>

<style>
	h1, figure, p {
		text-align: center;
		margin: 0 auto;
	}

	h1 {
		font-size: 2.8em;
		text-transform: uppercase;
		font-weight: 700;
		margin: 0 0 0.5em 0;
	}

	figure {
		margin: 0 0 1em 0;
	}

	img {
		width: 100%;
		max-width: 400px;
		margin: 0 0 1em 0;
	}

	p {
		margin: 1em auto;
	}

	@media (min-width: 480px) {
		h1 {
			font-size: 4em;
		}
	}
</style>

<svelte:head>
	<title>Sapper project template</title>
</svelte:head>

<h1>Great success!</h1>

<figure>
	<img alt="Success Kid" src="{successkid}">
	<figcaption>Have fun with Sapper!</figcaption>
</figure>

<p><strong>Try editing this file (src/routes/index.svelte) to test live reloading.</strong></p>
<svelte:head> 같이 커스텀 태그를 넣을 수 있는 듯
src/server.js, src/client.js로 엔트리포인트 다루기 가능
src/server.js
import sirv from 'sirv';
import polka from 'polka';
import compression from 'compression';
import * as sapper from '@sapper/server';

const { PORT, NODE_ENV } = process.env;
const dev = NODE_ENV === 'development';

polka() // You can also use Express
  .use(
    compression({ threshold: 0 }),
    sirv('static', { dev }),
    sapper.middleware()
  )
  .listen(PORT, (err) => {
    if (err) console.log('error', err);
  });
src/client.js
import * as sapper from '@sapper/app';

sapper.start({
  target: document.querySelector('#sapper'),
});
sapper를 다루다보면 next.js보다 훨씬 편리하다 느껴
src/routes/items/[id([0-9]+)].svelte 처럼 Dynamic Routing 가능
next로 URL 패턴 분기할 때 있었으면 싶었던 기능
SvelteKit(svelte@next)
실은 위의 sapper은 개발 중지가 결정된 상태
sveltekit 프레임워크로 svelte 본체와 통합
$ npm init svelte@next sveltekit-app
$ cd sveltekit-app
$ yarn
$ yarn dev --open
흥미로운 것은 2020/12/05 기준으로 작동 안함
글 쓰는 초기 시점에는 작동한 기분인데
@snowpack/plugin-svelte가 없어서 더해보면 에러가 나옴
Failed to init component
<Root>
Error: options.hydrate only works if the component was compiled with the `hydratable: true` option
SSR, Hydration 같은게 제대로 작동 안하는듯
sapper는 확실히 hydration에 문제를 안고 있기에 svelte 본체로 SSR 다시 만드는게 나을지도
작동은 안해도 구성은 이런 느낌
.
├── README.md
├── package-lock.json
├── package.json
├── snowpack.config.js
├── src
│   ├── app.html
│   ├── components
│   │   └── Counter.svelte
│   ├── globals.d.ts
│   └── routes
│       └── index.svelte
├── static
│   ├── favicon.ico
│   └── robots.txt
├── svelte.config.js
├── tsconfig.json
└── yarn.lock

4 directories, 13 files
rollup 제작자인데도 snowpack 사용하는 것이 재밌음
어느걸 선택해도 native esm 베이스 설계이므로 상성은 좋아보임
routes/index.svelte를 보았지만 딱히 언급할 거리는 없음. 그냥 svelte component.
다른 흥미로운 점은 지금 svelte에는 svelte.config.js가 새로 생김
const sveltePreprocess = require('svelte-preprocess');
module.exports = {
  // Consult https://github.com/sveltejs/svelte-preprocess
  // for more information about preprocessors
  preprocess: sveltePreprocess(),
  // By default, `npm run build` will create a standard Node app.
  // You can create optimized builds for different platforms by
  // specifying a different adapter
  adapter: '@sveltejs/adapter-node',
};
@sveltejs/adapter-node가 뭔지도 궁금.
앞으로 deno나 다른 처리(브라우저 같은)에서도 작동하는 것도 가능해보임
아직 개발 도중이므로 개발진척도에 따라 충분히 바뀔 듯
Remix
지금까지 언급한 것과 궤를 달리하는데, react-router를 제작한 Michael Jackson, Ryan Florence가 시작한 풀스택 프레임워크 개발환경. 아직 출시상태 아님. 유료 지원 라이센스
///////////////////////////////////////////////////////////////////
// Server side loaders fetch data from anywhere
const db = require('../db');
module.exports = async ({ params }) => {
  let user = await db.query(`users/${params.userId}`);
  return fetch(`https://api.github.com/users/${user.githubLogin}`);
};

///////////////////////////////////////////////////////////////////
// Data gets passed to your route component
export default function UserGithubProfile({ data }) {
  return (
    <div>
      <h1>{data.name}</h1>
      <Avatar src={data.avatar_url} />
    </div>
  );
}
샘플 코드는 이뿐이므로 유료등록하지 않은 필자로써 실체를 알 수 없지만 blitz 같은 풀스택 프레임워크로 예상
개인적으로 react-router에 호되게 당한 적 밖에 없어 가까이 하기 싫으므로 누군가 대신해주면 좋겠음
Flareact
Next.js 영향을 받았음
Cloudflare Workers의 Edge Worker에서 작동하도록 설계된 것
Cloudflare Workers CLI 도구인 wrangler를 설치해서 셋업함.
$ npm i @cloudflare/wrangler -g
$ wrangler generate flareact-app https://github.com/flareact/flareact-template
$ cd flareact-app
$ yarn install
$ yarn add flareact@alpha typescript
$ yarn add -D @types/react
$ yarn add @cloudflare/wrangler -D # 문서에는 없었지만 필요했다. 경로의존?
작동하려면 cloudflare workers 계정이 필요해서 해보니 그럭저럭이며 무료서비스.
account_id를 wrangler.toml에 세팅.
$ yarn dev # http://127.0.0.1:8787/
동적 루트, edge 실행 테스트를 위해 pages/xxx/[yyy]/[zzz].tsx 추가 해봄
export async function getEdgeProps({ params }) {
  return {
    props: {
      params,
    },
    revalidate: 60,
  };
}
export default function Index(props) {
  return (
    <h1>
      xxx/yyy/zzz
      <pre>{JSON.stringify(props)}</pre>
    </h1>
  );
}
getEdgeProps()는 next.js의 getServerSideProps()이며 Edge Worker로 실행되는 부분
next.js의 ISR 같이 60초 후 재검증가능
pages/api/hello.ts API 루트도 추가해봄
export default async (event) => {
  return new Response('ok');
};
cloudflare workers는 ServiceWorker의 API 틀이므로 요런 느낌.
pages/api/*.ts
.
├── README.md
├── dist
│   └── worker.js
├── index.js
├── out
├── package.json
├── pages
│   ├── api
│   │   └── hello.ts
│   ├── index.ts
│   └── xxx
│       └── [yyy]
│           └── [zzz].tsx
├── public
├── tsconfig.json
├── worker
│   └── script.js
├── wrangler.toml
└── yarn.lock

8 directories, 11 files
flareact에 들어간 webpack으로 dist/worker.js, out/_flareact/*의 정적 에셋 나옴.
다른 Edge로 움직인다면 next.js를 AWS Lambda@Edge로 움직이는 serverless-next가 있음
개인적으로는 cloudflare workers를 권함. 이유는 벤치마크
이전에 다뤄볼 때에 비추어볼 때 기능이 늘어 놀람.
좋아보이므로 쓸만한 곳이 있으면 써보고 싶음
일단 flareact + prisma도 가능할 듯?
layr
RPC로 클라/서버에 하나의 모델를 조작하려는 라이브러리
어떤 의미로 isomorphism
시간이 없으므로 제대로 돌려보지 못했지만 레포지토리가 흥미로움.
import { Component, expose, validators } from '@layr/component';
import { Storable, primaryIdentifier, attribute } from '@layr/storable';

const { notEmpty } = validators;

@expose({
  find: { call: true },
  prototype: {
    load: { call: true },
    save: { call: true },
    delete: { call: true },
  },
})
export class Movie extends Storable(Component) {
  @expose({ get: true, set: true }) @primaryIdentifier() id!: string;

  @expose({ get: true, set: true })
  @attribute('string', { validators: [notEmpty()] })
  title = '';

  @expose({ get: true, set: true }) @attribute('number?') year?: number;

  @expose({ get: true, set: true }) @attribute('string') country = '';
}
frontend/src/components/movie-list.tsx
import { Component, attribute, consume } from '@layr/component';
import { Routable, route } from '@layr/routable';
import React from 'react';
import { view, useAsyncMemo } from '@layr/react-integration';

import type { Movie } from './movie';
import type { Common } from './common';

export class MovieList extends Routable(Component) {
  ['constructor']!: typeof MovieList;

  @consume() static Movie: ReturnType<typeof Movie>;
  @consume() static Common: typeof Common;

  @attribute('Movie[]?') items?: InstanceType<ReturnType<typeof Movie>>[];

  @view() static Layout({ children }: { children: React.ReactNode }) {
    return (
      <div>
        <h2>Movies</h2>
        {children}
      </div>
    );
  }

  @route('/movies', { aliases: ['/'] }) @view() static Main() {
    const [movieList, isLoading, loadingError, retryLoading] =
      useAsyncMemo(async () => {
        const movieList = new this();

        movieList.items = await this.Movie.find(
          {},
          { title: true, year: true },
          { sort: { year: 'desc', title: 'asc' } }
        );

        return movieList;
      }, []);

    if (isLoading) {
      return <this.Common.LoadingMessage />;
    }

    if (loadingError || movieList === undefined) {
      return (
        <this.Common.ErrorMessage
          message="Sorry, something went wrong while loading the movies."
          onRetry={retryLoading}
        />
      );
    }

    return (
      <this.Layout>
        <movieList.Main />
      </this.Layout>
    );
  }

  @view() Main() {
    const { Movie } = this.constructor;

    return (
      <>
        <ul>
          {this.items!.map((movie) => (
            <movie.ListItem key={movie.id} />
          ))}
        </ul>
        <p>
          <button onClick={() => Movie.Creator.navigate()}>New</button>
        </p>
      </>
    );
  }
}
계승 베이스 API는 개인적으로 좋아하지는 않지만 이 RPC화 발상은 흥미로움.
총평
현시점에는 frourio가 제일 사용하기 좋아 보였습니다. UI층이랑 구분되어 있어서 장소 구분없이 투입가능하다 느꼈습니다.
다음은 blitz, 좋은 규약으로 만드면 frourio보다 좋아 진화의 여지가 있습니다. 현상은 랩한 부분이 하나로 다루기 어려워보입니다. 그렇기에 bsion 같이 카운터도 나오는 듯합니다. 우선 zod, react-final-form은
bison를 사용할 생각은 없어보이지만 hygen 코드 생성은 blitz generate 같이 규칙 기반 설계를 개별로 넣을 여지가 있으므로 hygen은 다루기 쉽게 하나로 하고 싶습니다.
ORM은 prisma 1강. 현시점에는 prisma migrate가 experimental이지만 그래도 아무튼 prisma 선택이 많습니다.
React UI Framwork는 Chakra 선택이 늘어나느 느낌입니다. Chakra는 Tailwind 영향을 받은 UI 프레임워크이며 tailwind가 점점 향상되면서 React 계 tailwind 선택이 늘어나고 있습니다.
flareact는 사용할 곳을 잘 고르면 좋게 사용 가능함. React로 Edge 에서만 다루는 체험을 실현하고 싶다면 이 프레임워크임. AWS 환경이라면 serverless-next도 가능할지도 모릅니다.
graphql 근처가 그다지 였지만 blitz, layr, aspida 같이 RPC화로 URL를 은닉하는 것이 많아지고 있습니다. 개인적으로 언어와는 별개로 TS와 조합하는 것이 GraphQL은 오버킬이라 느꼈으므로 풀스택이라면 이 노선은 반가운 뉴스입니다.
sveltekit, aleph는... 후발주자인 만큼 필요한 기능의 구현조차 잘 되어 있지 않은 인상 rollup, deno 선택에 도움되도록 힘냈으면 좋겠습니다.